Key Takeaways
- You can fix 80% of ergonomic problems without spending a dollar – book stacks, rolled towels, and better habits go a long way.
- A fully functional ergonomic setup costs as little as $80 to $150 when you know what actually matters (Robertson et al., 2009).
- Workers with proper ergonomic setups report 25% fewer musculoskeletal complaints than those without, regardless of budget (Amick et al., 2012).
- Your chair is the single highest-impact purchase – it controls your spine position for 6 to 8 hours every day.
- Most “ergonomic” gadgets are marketing fluff. This guide tells you what to skip so you don’t waste money.
What You’ll Learn in This Guide
- Free fixes you can do right now (zero dollars)
- The $50 budget – what to prioritize first
- The $150 budget – the sweet spot for most people
- The $300+ budget – building it right
- What NOT to spend money on
- DIY ergonomic fixes that actually work
- The one investment that matters most
- Putting it all together
Here’s what nobody tells you about ergonomic setups: the most expensive option isn’t always the best one.
You’ve probably seen those sleek standing desks, $1,500 office chairs, and Instagram-perfect home offices. They look incredible. But research from Cornell University’s Human Factors and Ergonomics Lab shows that proper positioning matters far more than premium equipment. A well-adjusted $150 setup outperforms a poorly configured $2,000 one every single time.
If you’re working from home on a tight budget – or just don’t want to overspend – this guide breaks down exactly where your money makes the biggest difference. We’ll walk through every budget tier, show you what to skip entirely, and help you build a workspace that actually protects your body.
Free Fixes You Can Do Right Now
Before you spend anything, let’s talk about what you can do today with stuff you already own. These aren’t hacks or workarounds. They’re legitimate ergonomic adjustments that physical therapists recommend.
Monitor and screen positioning
Your screen height is the single most common ergonomic mistake in home offices. If you’re looking down at a laptop on a flat desk, your neck is bearing up to 60 pounds of force instead of the normal 12 (Hansraj, 2014).
Free screen height fix
- Stack books or boxes under your laptop until the top of the screen hits eye level
- Use a shoebox as a monitor riser – sturdy, free, and the right height for most desks
- Move your chair down instead of the screen up if your desk is already high enough
- Tilt the screen back about 10 to 15 degrees so you’re not craning your neck forward
Lumbar support from your closet
That kitchen chair you’re sitting on? It’s probably missing lower back support entirely. A rolled-up bath towel does exactly what a $40 lumbar pillow does. Roll it to about 4 inches in diameter and place it in the curve of your lower back.
Why this actually works
Lumbar support maintains the natural lordotic curve of your lower spine. Without it, your pelvis tilts backward, your lower back rounds, and disc pressure increases by up to 40% (Nachemson, 1976). The towel or cushion isn’t luxury – it’s preventing measurable spinal compression.
Footrest from household items
If your feet don’t rest flat on the floor when your chair is at the right height, you need a footrest. This isn’t optional. Dangling feet create pressure on the backs of your thighs, restrict blood flow, and force your pelvis into a bad position.
- A stack of old textbooks – aim for 3 to 4 inches of height
- A sturdy cardboard box filled with books for weight
- A yoga block if you have one lying around
The $50 Budget: What to Prioritize First
If you have $50 to spend, you can solve the two biggest ergonomic problems most home workers face: wrist strain and neck strain.
Priority 1: External keyboard ($15 to $25)
An external keyboard lets you separate your screen from your typing surface. That separation is everything. It means you can raise your laptop to eye level without your arms reaching up to type.
What to look for in a budget keyboard
- Low profile keys – reduces wrist extension angle
- Standard layout – avoid cramped compact keyboards
- USB or Bluetooth – either works, wireless keeps your desk cleaner
- Skip “ergonomic” split keyboards at this price point – the cheap ones are worse than a standard flat board
Priority 2: Laptop stand or riser ($15 to $35)
If the book-stack method feels unstable, a basic laptop stand locks your screen at the right height permanently. Look for one with adjustable angle and ventilation slots so your laptop doesn’t overheat.
Remaining budget: seat cushion ($15 to $20)
A basic memory foam seat cushion adds a surprising amount of comfort to a hard kitchen chair. It won’t fix your posture by itself, but combined with the towel lumbar support, it bridges the gap until you can invest in a proper chair.
Don’t fall for this mistake at $50
Spending your entire $50 on a single “ergonomic” gadget like a fancy mouse or a wrist rest. Spread it across the keyboard, stand, and cushion. The combined impact of fixing three problems beats throwing money at one.
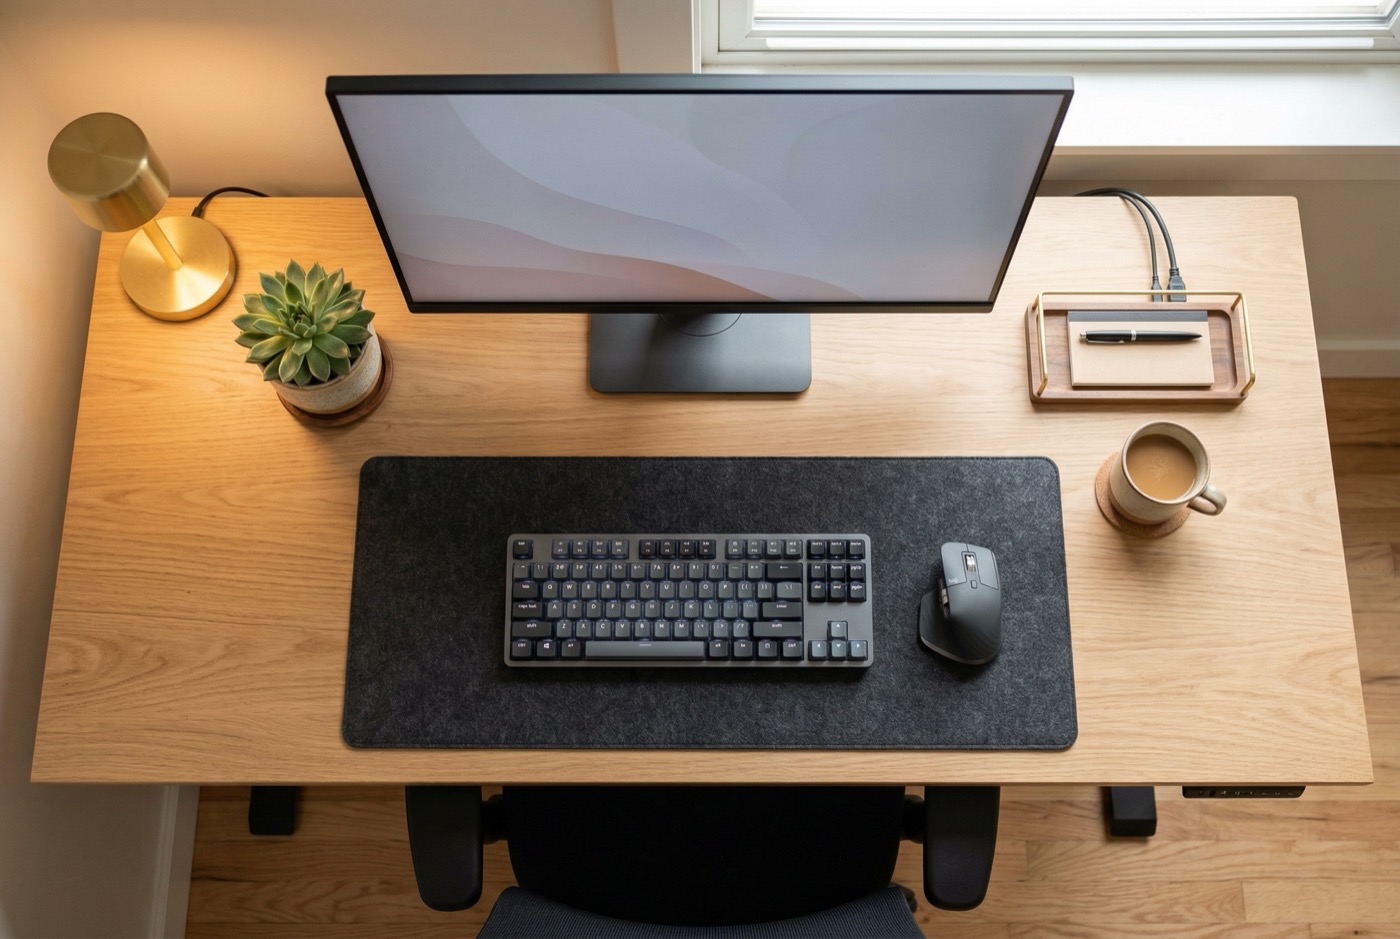
The $150 Budget: The Sweet Spot
This is where things get exciting. At $150, you can build a setup that covers every major ergonomic need. Research from the University of Cincinnati found that comprehensive workstation adjustments at this price range reduced musculoskeletal discomfort by 40% (Robertson et al., 2009).
The $150 breakdown
Sample $150 budget allocation
- External keyboard and mouse: $25 to $35
- Laptop stand: $20 to $30
- Seat cushion and lumbar support: $25 to $35
- Document holder: $10 to $15
- Desk lamp (reduce eye strain): $15 to $25
- Remaining: Save toward a proper chair
Why a document holder matters
If you reference papers or a second screen while you work, a document holder eliminates the constant neck rotation that causes cervical strain over weeks and months. It’s one of those $12 purchases that punches way above its weight.
The lighting upgrade most people skip
Eye strain is an ergonomic problem too. If you’re squinting at a dim screen in a dark room, your whole body tenses up. A basic desk lamp with adjustable brightness reduces eye fatigue, headaches, and the unconscious forward lean that comes from trying to see your screen better.
The 80/20 rule of ergonomics
At $150, you’ve covered roughly 80% of what a $2,000 setup achieves. The remaining 20% is mostly about chair quality and adjustability. Don’t let perfect be the enemy of functional – a well-configured $150 workspace beats an unconfigured $1,000 one.
Overpriced versions of cheap solutions
Where you’re paying for branding, not function
- $80 monitor risers – a $15 stand does the same job
- $60 footrests – a stack of books works identically
- $50 cable management kits – velcro strips from the dollar store accomplish the same thing
- “Gaming” ergonomic chairs ($200 to $400) – most use the same bucket seat design that racing cars use, which is designed to hold you in place during crashes, not support 8 hours of desk work
The real test for any ergonomic product
Ask yourself: “Does this change my body position, or just make my current position slightly more comfortable?” Products that change your position (chairs, stands, keyboard separation) deliver lasting results. Products that pad your current position (cushions, wrist rests, backrests) are temporary fixes.
DIY Ergonomic Fixes That Actually Work
You don’t need to buy anything for these. They’re free, evidence-based, and most physical therapists will tell you to do them before spending a dime on equipment.
The 30-minute movement rule
Research consistently shows that regular movement provides more health benefit than any piece of equipment. A 2019 study in the British Journal of Sports Medicine found that breaking up sitting time every 30 minutes reduced lower back discomfort by 32%.
Free movement habits to build
- Every 30 minutes: Stand up, roll your shoulders back 5 times, sit back down
- Every hour: Walk to another room and back (60 seconds is enough)
- Every 2 hours: Do 3 desk stretches from our 5 Desk Stretches guide
- After lunch: Take a 10-minute walk outside if possible
DIY desk height adjustment
Your desk height should put your elbows at roughly 90 degrees when typing. If it’s too high, raising your chair and adding a footrest is easier than lowering the desk. If it’s too low, bed risers ($8 for a pack of 4) under the desk legs solve it instantly.
The posture reset technique
Every time you sit down, do this 5-second reset:
- Scoot your hips all the way to the back of the chair
- Roll your shoulders up, back, and down once
- Tuck your chin slightly so your ears stack over your shoulders
- Plant your feet flat on the floor or footrest
It sounds simple because it is. The problem is that nobody remembers to do it after the first day. Pairing it with a trigger – like every time you open your laptop or pick up your coffee – builds the habit automatically. For more on building a full ergonomic workspace routine, check out our Ergonomic Tips for Remote Workers guide.
Signs your DIY setup is working
- Less end-of-day neck and shoulder tightness
- You can work for 2+ hours before feeling the urge to shift
- Fewer headaches, especially in the afternoon
- Your back doesn’t ache when you stand up from your desk
Not Sure Where to Start With Your Setup?
Our Chair Finder Quiz helps you figure out what your body actually needs – based on your budget, work habits, and comfort goals.
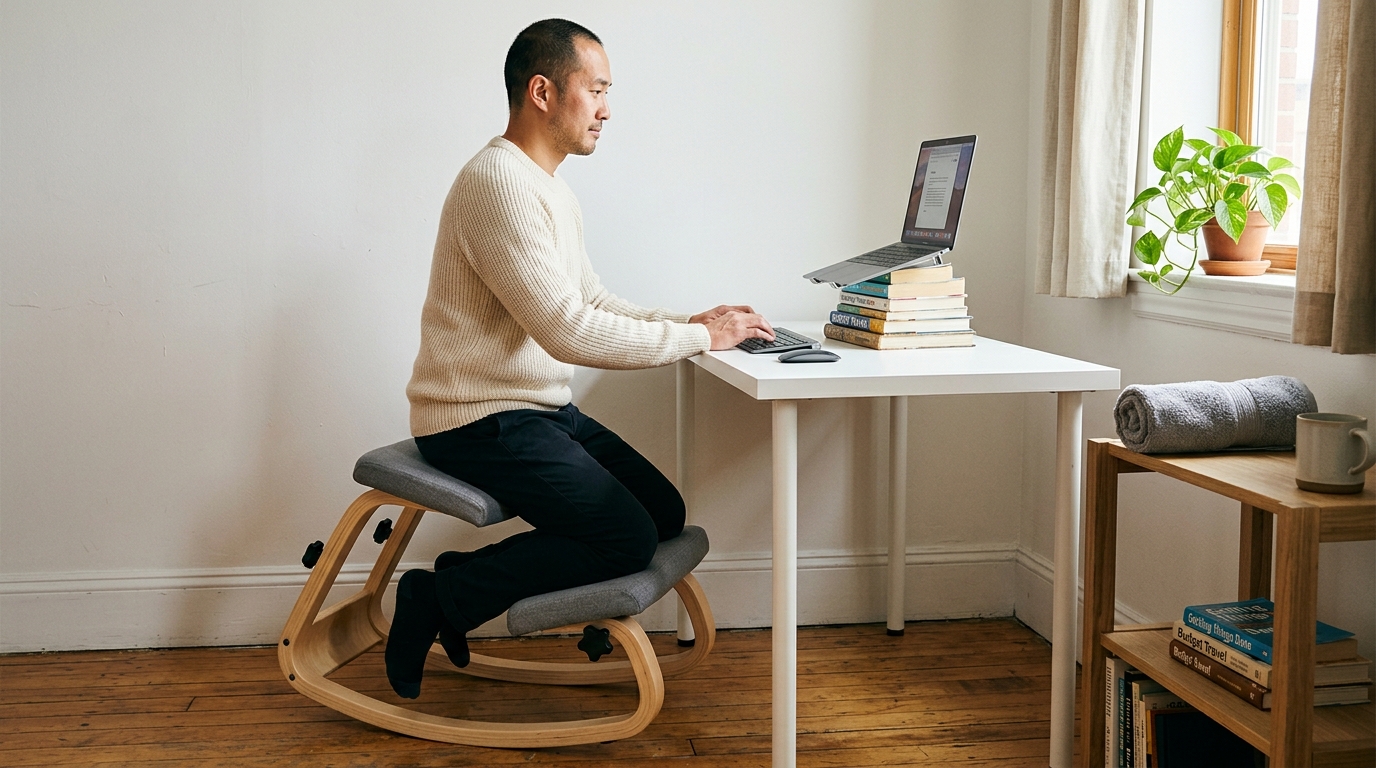
The One Investment That Matters Most
If you’ve read this far, you’ve noticed a pattern. Every section comes back to the same thing: the chair.
Your keyboard position matters. Your screen height matters. Movement breaks matter. But your chair is the one piece of equipment that controls your spine’s default position for the entire workday. Everything else optimizes around whatever your chair does to your body.
Why kneeling chairs work on any budget
Traditional ergonomic chairs try to prop your spine up with lumbar pads and headrests. Kneeling chairs take a different approach: they tilt your pelvis forward so your spine stacks naturally without any props.
Research from Betsch et al. (2020) found that kneeling chairs increase lumbar lordosis – the natural inward curve of your lower back – compared to standard seating. That’s significant because loss of that curve is what drives most desk-related back pain.
The budget argument for a kneeling chair
A quality kneeling chair replaces multiple accessories at once. You don’t need a separate lumbar pillow, seat cushion, or posture corrector. The chair does the positioning work mechanically, which means fewer things to buy, adjust, and replace over time. For a full comparison with standing desks, read our Standing Desk vs. Kneeling Chair breakdown.
Pairing your chair with the basics
Even with the right chair, you still want these essentials:
- Screen at eye level – whether by books, a $15 stand, or a monitor arm
- External keyboard – so your typing surface is independent of your screen height
- Good lighting – prevents the unconscious forward lean from squinting
- Movement breaks – no chair replaces the need to move every 30 minutes
Real talk about chair investment
Your body doesn’t care what you paid. It cares about the angle of your hips, the curve of your spine, and whether you’re moving enough. A $150 kneeling chair that positions you correctly outperforms a $1,200 executive chair that locks you in a 90-degree hip angle all day. For help setting up your entire desk around your new chair, see our Desk Ergonomics Guide.
Putting It All Together
Here’s your action plan, scaled to your budget:
Your budget-based action plan
- $0: Stack books under your laptop, roll a towel for lumbar support, set a 30-minute movement alarm
- $50: Add an external keyboard, laptop stand, and seat cushion
- $150: Add a document holder, desk lamp, and start saving for a chair
- $300+: Invest in a proper ergonomic chair first, then fill in accessories around it
The most important step is the first one. Don’t wait until you can afford the perfect setup. Raise your screen today. Roll a towel behind your back right now. Set that 30-minute alarm. These tiny changes protect your body while you save for the bigger investments.
Your workspace doesn’t need to be expensive. It needs to be intentional.
Ready to Make the One Investment That Matters?
The NYPOT Kneeling Chair gives your spine the position it needs – without the premium price tag. It’s the single highest-impact upgrade for any budget home office.
References
- Amick, B.C., et al. (2012). “Effect of office ergonomic intervention on reducing musculoskeletal symptoms.” Occupational and Environmental Medicine, 69(1), 27-34.
- Betsch, M., et al. (2020). “Influence of kneeling chairs on lumbar lordosis.” Clinical Biomechanics, 79, 105167.
- Gregory, D.E., Dunk, N.M., & Callaghan, J.P. (2006). “Stability ball versus office chair: Comparison of muscle activation and lumbar spine posture during prolonged sitting.” Human Factors, 48(1), 142-153.
- Hansraj, K. (2014). “Assessment of stresses in the cervical spine caused by posture and position of the head.” Surgical Technology International, 25, 277-279.
- Nachemson, A. (1976). “The lumbar spine: an orthopedic challenge.” Spine, 1(1), 59-71.
- Robertson, M.M., et al. (2009). “The effects of an office ergonomics training and chair intervention on worker knowledge, behavior and musculoskeletal risk.” Applied Ergonomics, 40(1), 124-135.
This article contains affiliate links. ErgoLife Foundation may earn a commission at no additional cost to you. All recommendations are based on our independent research and mission to improve workplace wellness.