Key Takeaways
- A guided self-assessment can reduce musculoskeletal discomfort by 38% over 12 weeks – comparable to professional assessments
- 12 checkpoints cover every major ergonomic risk factor, from monitor height to movement patterns
- Most people have 6-8 yellow fixes and 1-3 red flags – start with the quick wins first
- The five most common mistakes are screen too low, chair never adjusted, keyboard too high, no movement plan, and ignoring pain signals
- Your actual working posture – not your “best” posture – is what matters for this assessment
Professional ergonomic assessments cost $200 to $500 per workstation. They are valuable, but not always accessible or necessary. Many of the most impactful workspace problems are identifiable and fixable with a systematic self-assessment.
A 2019 study in Applied Ergonomics found that workers who completed a guided self-assessment checklist and made the recommended adjustments experienced a 38% reduction in musculoskeletal discomfort over 12 weeks – results comparable to professional assessments (Robertson et al., 2019).
The key word is “guided.” Walking around your office looking for problems without a system misses most issues. This guide gives you that system: a 12-point framework covering every major ergonomic risk factor.
Image Coming Soon
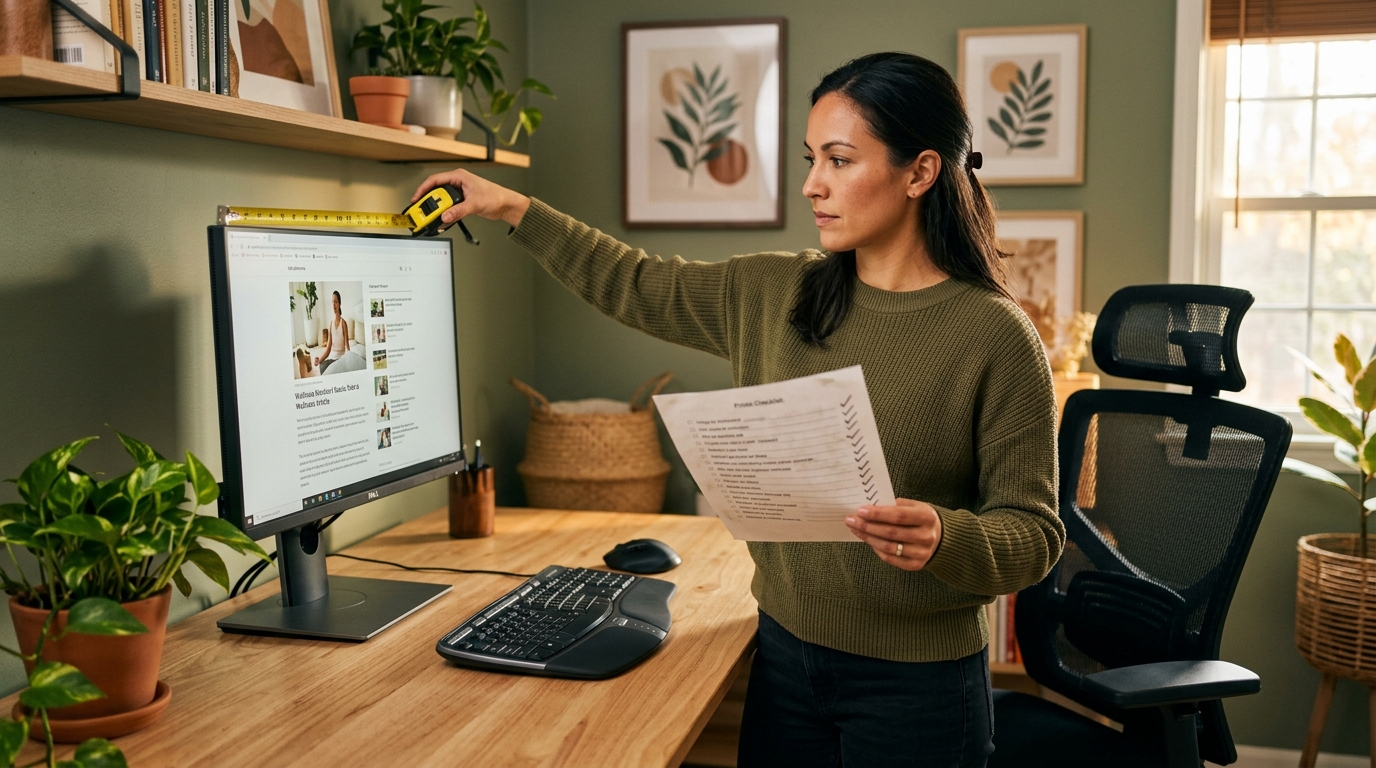
Person sitting at their workstation taking notes on a clipboard – evaluating their desk setup – woman in her 30s, modern home office, warm lighting
In This Article
- Screen setup: monitor height and distance
- Chair setup: seat height and back support
- Input devices: keyboard, mouse, and wrists
- Environment: documents, lighting, and temperature
- Posture and movement patterns
- Scoring your assessment
- The five most common workspace mistakes
- When to get professional help
- Making your changes stick
Screen Setup: Monitor Height and Distance
Checkpoint 1: Monitor height
The standard: the top of your screen should be at or slightly below eye level. Your eyes should naturally fall on the upper third of the screen without tilting your head.
How to check: Sit naturally. Close your eyes and let your head settle into a comfortable position. Open your eyes. If you are looking at the top third of your screen, you are set. If you are looking above the screen or at the bottom half, adjustment is needed.
Checkpoint 2: Monitor distance
Your screen should be approximately one arm’s length away (20 to 26 inches). Extend your arm straight in front of you. Your fingertips should just touch the screen. If you have to lean forward, it is too far. If your palm touches it, it is too close.
If you are at the right distance but struggle to read, increase font size or display scaling rather than moving the screen closer. Moving the screen closer increases eye strain and forces a narrower focal range.
Image Coming Soon
Side view of correct monitor height and distance – showing eye level alignment with top of screen and arm-length distance – clean diagram with measurement labels
Chair Setup: Seat Height and Back Support
Checkpoint 3: Seat height
The standard: feet flat on the floor with knees at approximately the same height as or slightly below your hips. Thighs roughly parallel to the floor.
How to check: Look at the angle of your thighs. Sloping downward from hip to knee? Chair is too high. Knees above hips? Too low. Feet dangling? Definitely too high.
Set your chair height for your body first, then adjust the desk or keyboard to match. Many people do the opposite – setting chair height to match the desk – and end up with a poor fit for their body.
Checkpoint 4: Back support
The backrest should support the natural inward curve of your lumbar spine. Sit all the way back. Place your hand between your lower back and the backrest. A gap larger than a fist width means inadequate lumbar support. Feeling pushed forward means the support is too aggressive or positioned too high.
If your chair scored poorly on height adjustment, lumbar support, or seat depth, that is the highest-impact area to fix first. Our Chair Finder Quiz translates your assessment scores into a specific chair recommendation.
Image Coming Soon
Close-up of proper chair adjustment – showing correct seat height, lumbar support position, and thigh angle – annotated photo with measurement guides – woman in her 40s
Input Devices: Keyboard, Mouse, and Wrists
Checkpoint 5: Keyboard height and position
Elbows should be at approximately 90 to 110 degrees when typing. Forearms roughly parallel to the floor or angled slightly downward. Shoulders relaxed, not elevated.
Checkpoint 6: Mouse position
Your mouse should be directly next to your keyboard, at the same height, reachable without extending your arm or shifting your shoulder. Full-size keyboards with a number pad push the mouse far to the right. Consider a compact keyboard without a number pad if you use a mouse frequently.
Checkpoint 7: Wrist position
Wrists in a neutral position while typing – straight, not bent upward, downward, or to either side. Workers who type more than four hours daily have a 2.5x higher risk of developing wrist and hand symptoms. Neutral wrist position is one of the most effective protective factors (Andersen et al., 2020). Poor wrist alignment often pairs with the same poor posture that causes back pain.
Image Coming Soon
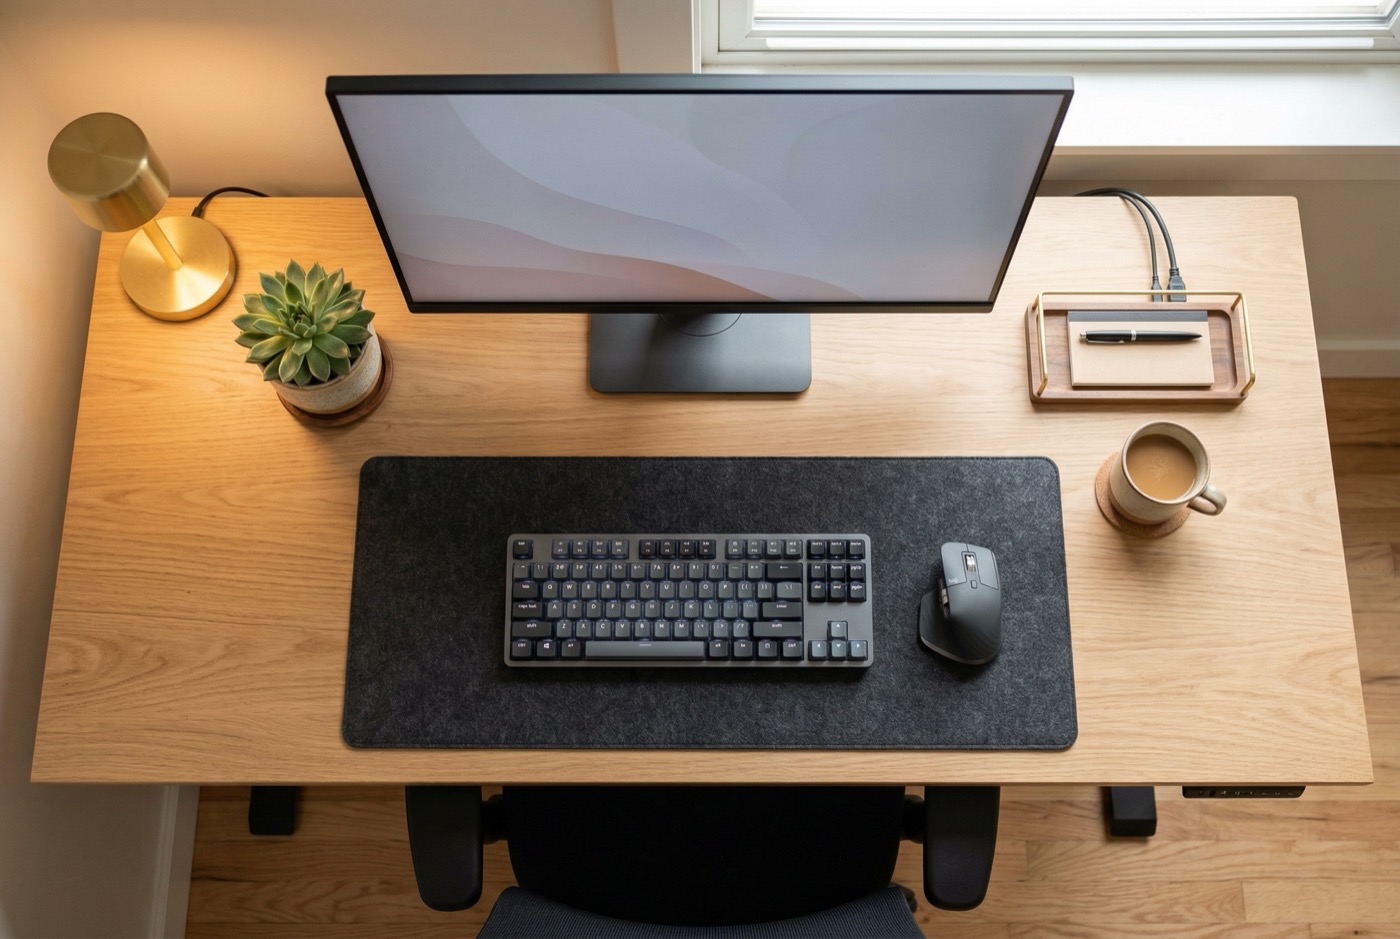
Overhead view of proper keyboard and mouse positioning – showing neutral wrist angle, compact keyboard placement, and mouse within easy reach – clean workspace photo
Environment: Documents, Lighting, and Temperature
Checkpoint 8: Phone and document position
Frequently referenced documents should be at the same height and distance as your screen. A simple angled document holder next to the monitor eliminates repeated neck flexion. For phone use, a headset is essential if you talk and type simultaneously.
Image Coming Soon
Person using a document holder mounted next to their monitor – showing proper reference document placement at eye level – man in his 30s, corporate office with natural light
Checkpoint 9: Lighting
How to check: Turn off your monitor and look at the black screen. Can you see bright light sources reflected? Those reflections create glare that forces squinting or awkward leaning. Position your screen perpendicular to windows. Use blinds or shades. Add a desk lamp for document reading.
Checkpoint 10: Temperature and airflow
The comfortable range for most people is 68 to 74 degrees Fahrenheit. Direct airflow from vents blowing on your neck, shoulders, or hands causes unconscious muscle bracing. Even a small vent redirect can make a meaningful difference.
- Document holder next to monitor ($10-15)
- Headset for phone calls ($20-40)
- Screen positioned perpendicular to windows (free)
- Desk lamp for task lighting ($15-25)
- Vent redirect for direct airflow (free)
Posture and Movement Patterns
Checkpoint 11: Your actual working posture
This is not about your posture right now while you are thinking about it. It is about your habitual posture – what you default to when you are absorbed in work.
Ask someone to take a photo of you from the side while you are working and unaware. Or set your phone on a timer. Most people are surprised by how different their actual working posture is from what they imagine. Assessing your posture by sitting up straight and checking the mirror gives you misleading information.
Checkpoint 12: Movement patterns
You should be changing position or getting up at least every 30 to 45 minutes. Prolonged static posture in any position – even a “perfect” one – creates cumulative stress. Track your actual movement for one workday. Most people estimate they move more frequently than they actually do.
Design your environment for movement. Use a smaller water glass to force more trips to the kitchen, schedule walking meetings, or use break-reminder software. The method matters less than the consistency. Learn more in our complete desk ergonomics guide.
Image Coming Soon
Person standing and stretching near their desk during a movement break – timer visible on screen showing 30-minute reminder – woman in her 40s, modern open office
Scoring Your Assessment
After working through all 12 checkpoints, categorize your findings:
- Green (no action needed): This checkpoint meets the standard. No changes required.
- Yellow (simple fix): Does not meet the standard, but correctable with repositioning, a low-cost prop, or a behavioral change.
- Red (needs investment): Significant problem requiring new equipment, workspace reconfiguration, or professional guidance.
Scored Below 7 on Chair Setup? Here Is Your Next Step.
If the chair section of your assessment revealed gaps, our Chair Finder Quiz picks up where your self-assessment left off. It factors in your specific scores, body dimensions, and work habits to recommend the right upgrade.
The Five Most Common Workspace Mistakes
After reviewing thousands of workstation assessments, these mistakes appear most frequently:
- Screen too low. The single most common finding. Laptops, screens on desks without risers, and monitors not adjusted to individual height. Fix: raise the screen.
- Chair never adjusted after purchase. Most people sit in their chair exactly as it arrived. Every adjustable feature should be tuned to your body. Fix: spend ten minutes adjusting every feature.
- Keyboard too high. When the desk surface is above elbow height, typing forces shoulder elevation all day. Fix: keyboard tray or raise your chair and add a footrest.
- No movement plan. Awareness without a trigger rarely leads to consistent action. Fix: environmental design (small water glass, timed reminders, walking meetings).
- Ignoring pain signals. Discomfort is information. The productive response is to identify the source, not take ibuprofen and push through. Fix: treat pain as a diagnostic tool.
Image Coming Soon
Infographic showing the five most common workspace mistakes as icons with brief labels – screen too low, chair unadjusted, keyboard too high, no movement plan, ignoring pain – clean layout with green and terracotta accents
When to Get Professional Help
A self-assessment is a powerful starting point, but professional input is necessary in certain situations:
- Persistent symptoms despite corrections: If you still experience pain after 2-4 weeks of adjustments, a professional can identify factors you may be missing
- Complex medical conditions: Pre-existing conditions like scoliosis, herniated discs, or carpal tunnel syndrome may require a tailored assessment
- New neurological symptoms: Numbness, tingling, weakness, or loss of coordination should be evaluated promptly
- Workplace accommodation needs: A professional assessment provides the documentation employers and insurance providers require
Making Your Changes Stick
The biggest risk with a self-assessment is the “first week effect” – making improvements enthusiastically, then drifting back to old habits. To avoid this:
- Change one thing at a time. Implement the highest-impact fix first. Live with it for a week. Then add the next one.
- Take a follow-up photo. After adjustments, take a new side-view photo. Compare it to your baseline in 30 days.
- Schedule a reassessment. Set a calendar reminder for 90 days to run through the 12 checkpoints again.
- Share your findings. If you work in an office, share this assessment with colleagues. Ergonomic awareness is contagious.
Image Coming Soon
Before and after side-by-side comparison of the same workspace – left shows common mistakes, right shows corrected ergonomic setup – clean, labeled comparison with green checkmarks
Your workspace is a tool, and like any tool, it works best when it is set up for the person using it. A 12-point assessment takes 20 to 30 minutes. The comfort and health benefits last for years. For more guidance on specific fixes, explore our posture improvement guide, chair selection guide, and budget-friendly ergonomic fixes.
Assessment Complete. Now Act on It.
You have identified the gaps. The most common gap – and the one with the highest ROI – is your chair. Our quiz turns your assessment results into an actionable chair recommendation in 60 seconds.
Related reading
- Desk Ergonomics Guide: Set Up Your Workspace Right
- How to Choose an Ergonomic Chair: What Actually Matters
- Home Office Ergonomics on a Budget
References
- Andersen, J. H., et al. (2020). “Risk factors for wrist and hand symptoms among computer workers.” Occupational and Environmental Medicine, 77(4), 250-256.
- Hedge, A. (2017). “Ergonomic workplace design for health, wellness, and productivity.” CRC Press.
- OSHA. (2023). “Computer Workstations eTool.” Occupational Safety and Health Administration.
- Robertson, M. M., et al. (2019). “The effects of an office ergonomics training and chair intervention on worker knowledge, behavior and musculoskeletal risk.” Applied Ergonomics, 40(1), 124-135.
- Shariat, A., et al. (2018). “Effects of stretching exercise training and ergonomic modifications on musculoskeletal discomforts of office workers.” Brazilian Journal of Physical Therapy, 22(2), 144-153.
This article contains affiliate links. ErgoLife Foundation may earn a commission at no additional cost to you. All recommendations are based on our independent research and mission to improve workplace wellness.